How to Apply High-End Whiteboard Paint
Introduction: Applying our high-quality whiteboard coatings is easy if you follow the step-by-step instructions provided with each of our kits and in an online video on our website. Preparation of your surface, mixing of the two-part formula, applying whiteboard paint, drying time, and creative use of your finished surface are all discussed below.
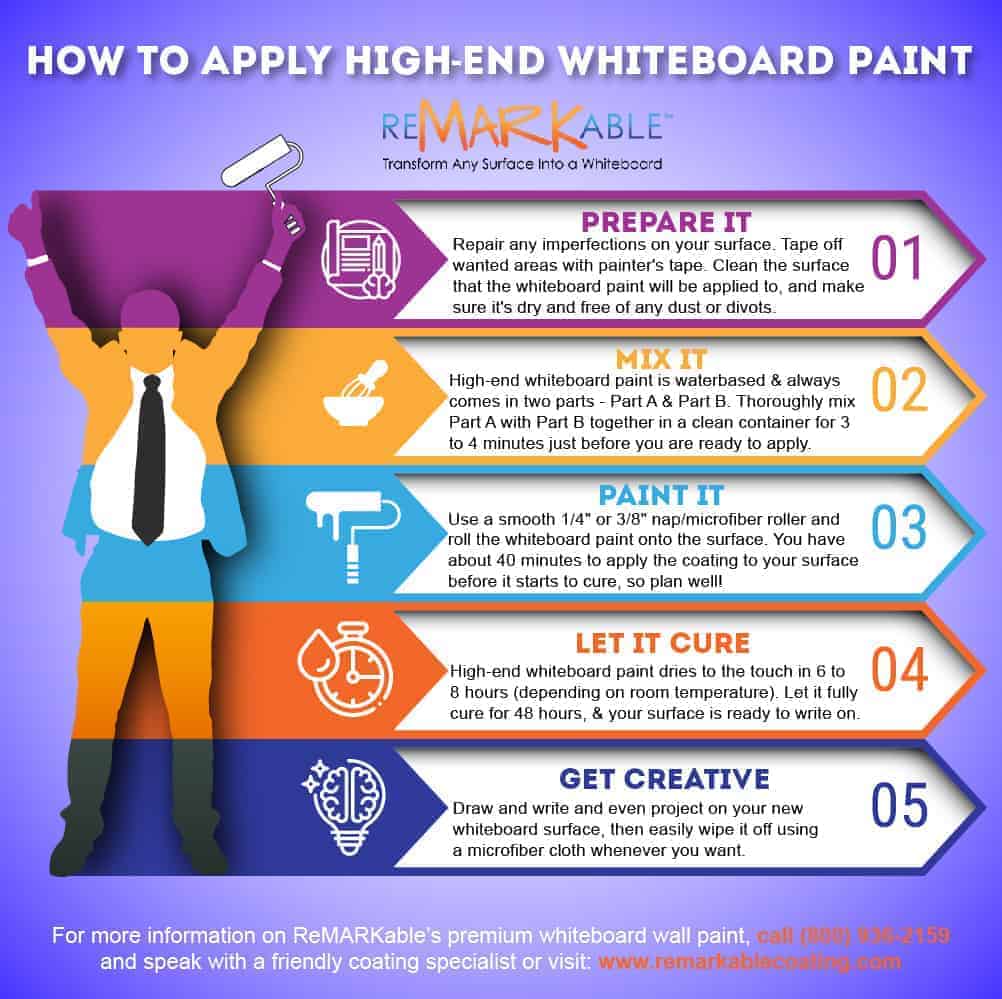
Preparing Whiteboard Paint
Use painter’s tape to tape off all the areas that you plan to paint, then clean the surface where the whiteboard paint will be applied, checking for any dust, scratches, holes, dents, divots, and uneven places. The smoother and unblemished your wall is before installation of our premium whiteboard coating, the easier it will be to write on and erase after the coating cures. Thus, it’s important to create as impeccable a finish as possible before installing your paint. Doing so will help to make sure that all writing and drawing on the wall will be consistently clear and easy to see and that erasing will not result in any smudges or streaks.
Repair any imperfections that you find on your surface by sanding the high spots with 200-250 grit sandpaper and filling in the blemished and low areas with spackling compound then sand the surface with the same grit of sandpaper. For this job, you can use a drywall pole sander to help guarantee a perfectly smooth, even surface for applying your paint. Next thoroughly wipe your wall with a water-moistened microfiber cloth, towel, or mitt and let it dry completely before applying a base coat of paint or the whiteboard coating itself.
Mixing Whiteboard Paint
High-end whiteboard paint is water-based and always comes in two parts, Part A and Part B. Thoroughly mix Part A and Part B together with a clean paint stirring stick in a clean container for three to four minutes just before the time you’re ready to apply the paint. Mixing should be done with a slow even motion so as not to cause any bubbles to occur in your final product. For the same reason avoid using an electric drill with a mixing attachment or a powerful churning or swirling action when stirring by hand. Bubbles in your mixed paint can compromise the quality of the sheen on your surface after it dries, producing tiny pores where dry erase marker ink will settle and be difficult to remove, thus affecting the writability and erasability of your whiteboard wall.
Painting Whiteboard Paint
Use a smooth full-sized 9-inch microfiber paint roller with a 1/4” or 3/8” nap to apply the blended whiteboard paint onto your smooth prepared surface. You’ll have approximately 40 to 45 minutes to apply the coating to your surface before it starts to congeal and become unusable, so plan well in advance as to how long you think the job will take to complete. If you have any questions about how much time it should require to coat your surface, you can contact our customer support team members, who are also installers with many years of experience in applying our products, and in counseling clients on all subjects related to preparation, application, and use.
As mentioned above, when applying our whiteboard paint we highly recommend that you use a full-sized 9″ microfiber paint roller sleeve that has a 1/4″ or 3/8″ nap. Our premium coatings are designed to be applied in thick layers, so using a roller sleeve made of foam or any type of synthetic material other than microfiber is not advised, as these types of sleeves are meant for applying paint in thin coats.
Before mixing and installing your paint, it’s best to eliminate all the excess lint from your paint roller by covering the entire roller with two-inch masking tape from end to end. When the roller sleeve is thoroughly wrapped in tape, gradually remove the tape, and the tape will attract any surplus lint on your roller sleeve, making your application easier and your surface smoother. The lint removal procedure should be done before the two components of our whiteboard paint formula are mixed together and before the application process begins.
Other factors to think of when applying your whiteboard coating are the temperature and relative humidity of the space where you’ll be working. The ambient temperature must be a steady 68o-77o F or 20o to 25o C during the curing stage after application. And during application, the temperature should range between 65° and 85°F or18o to 29o C. Before beginning to mix the two parts of the formula, it’s recommended that you allow them to adjust to the room temperature of 65°F – 85°F for a minimum of 24 hours. In colder climates, the acclimatizing process for the formula will take a longer time.
The relative humidity in the space where you’ll be installing the paint needs to be below 50%. This is an important aspect of the installation process to think about before you try to apply our quality whiteboard paint, because when the surrounding air is too humid the paint’s capacity to dry correctly can be impacted, thus affecting the sheen, writability and erasability of your finished whiteboard surface.
Letting Whiteboard Paint Cure
High-end whiteboard paint is dry to the touch in just six to eight hours depending on the prevailing temperature and relative humidity of the room where it’s applied. Let the paint dry for a full 48 hours and you’re ready to write and draw on it to your heart’s content. Then after it’s cured be sure to maintain your surface by regular cleaning with a microfiber cloth and an occasional wipe down with a microfiber cloth and a water-based whiteboard surface cleaner such as our eco-friendly proprietary brand.
The brief curing period of our quality water-based whiteboard coatings allows you to save precious time and resources by letting you use your surface more quickly than would be possible with other low-end brands of epoxy-based whiteboard paint. Also, the fact that our paint is extremely low in odor and volatile organic compounds (VOCs) allows your team members to stay at work in the area where it’s curing, saving you the time and expense of having to move your operation to a temporary location.
Get Creative With Whiteboard Paint
After it’s dry you can write, draw, and even project on your whiteboard coated surface as much and as often as you like for staff meetings, brainstorming sessions, seminars, conferences, impromptu small-group discussions, and an endless array of other uses. The broad open-ended nature of your whiteboard coated wall will tend to bring out the creative side of users, who don’t experience the space limitations found with traditional framed whiteboards. Writing and drawing become more expansive and free-flowing as the unfettered quality of a surface stretching from floor to ceiling and corner to corner makes the mind free and able to express ideas without constraint. Compared to the restricted spaces available on writing paper, note pads, laptops, flip charts, tablets, and computer screens, whiteboard coated walls give unlimited opportunities for original expression of thoughts and images, all of which can be easily erased when new ideas emerge until the end of a project is reached.
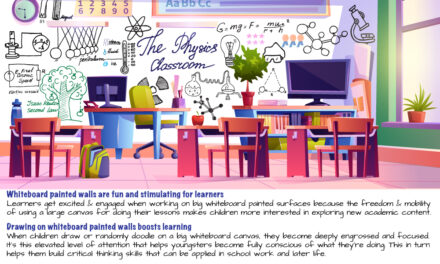
Many team members, family members, and others who have the chance to write, draw, and doodle on whiteboard painted surfaces feel a new and exciting sense of freedom to express themselves. Even those who are more inhibited or shy about airing their ideas in business meetings, classrooms, family gatherings, or other settings tend to let loose more easily when confronted with the vast expanses of a whiteboard painted wall. This creativity-enhancing quality is the major reason world-renowned corporations, organizations, and academic institutions such as Facebook, Inc, Harvard, Princeton, and Yale Universities, Google LLC, and the Starbucks and Sony Corporations all decided to have our quality whiteboard painted surfaces installed in their offices, classrooms, and other venues.


![Giant Leaps Forward Require Big Spaces. [Leap Year Sale Event!]](https://www.remarkablecoating.com/wp-content/uploads/2016/02/Giant-Leaps-ForwardRequire-Big-Spaces-440x264.jpg)


![30% Off St Patrick’s Day Sale! [Details Inside]](https://www.remarkablecoating.com/wp-content/uploads/2016/03/Glorious-1-440x264.png)

![Drive Your Organization Into Openness and Watch it Expand [20% Off Whiteboard Paint]](https://www.remarkablecoating.com/wp-content/uploads/2016/04/Drive-Your-Organization-Into-Openness-and-Watch-It-Expand.-1-440x264.jpg)


![ReMARKable’s Winter Sale is Here! [25% Off + Free Shipping]](https://www.remarkablecoating.com/wp-content/uploads/2018/01/Red-Tag-Winter-Fashion-Facebook-Post-1-440x264.png)


![ReMARKable Summer Sale 2018 [28% Off Whiteboard Paint]](https://www.remarkablecoating.com/wp-content/uploads/2018/06/Blue-Simple-Line-Beach-Facebook-Post-1-440x264.png)


0 Comments