

How To Make a Whiteboard Wall for the Ultimate Home Office?
The atmosphere and work efficiency of your home office can be significantly improved by applying top-quality dry erase paint to one or more of the office walls. Having a whiteboard wall in your remote work environment will allow you to do a host of activities in a more organized and proficient way. For example, your daily or weekly work schedule can be regularly posted and easily altered due to the ease of writing on and erasing your whiteboard painted wall. And when it comes to virtual meetings, your wall can make the presentation of large text and images a breeze so that all participants can easily see the content. A dry erase wall also serves as a perfect place for writing down notes during phone calls, writing memos to yourself about important appointments, and much more.
If you choose to make the move to an improved home office environment by installing a whiteboard painted wall, the following are some basic steps to follow in completing the process.
Choose Your Whiteboard Wall’s Color
Start by deciding if you want a solid-colored or patterned whiteboard wall. The color can be white as with a traditional framed whiteboard, or may it be any other light color that you like. If you decide you want something other than white and would like to play around with color and pattern a bit, it’s essential to select a light color for your surface, such as baby blue, lavender, light yellow, or chartreuse, so as to make sure that the writing and drawing you do on the wall will be easy to see. In other words, for your dry erase wall to work well, there should always be a sharp contrast between the background color and the color of your dry erase markings.
In choosing between a white or colored wall, it’s a good idea to think about the ambiance you want to create in your home office, as well as the other items in the area, such as your desk, chair, cabinets, and shelves. If you already have pieces of furniture or office equipment that are of a specific color, you might want to choose a dry erase wall color that goes well with the colors of what’s in the room. In any case, a white dry erase wall is an option that can go with any color scheme.
Prepare the Background of your Whiteboard Surface
If you plan to keep the current color of your wall, make sure the existing paint is a quality satin or eggshell finish. If you are not sure or know that it is a flat or matte finish, you’ll need to repaint it in that color. You’ll get the best results from your dry erase paint application if you apply a fresh coat of the recommended type of paint as the base coat. When painting the wall in the original color or with a new shade of your choice, be sure to create a solid, smooth finish with no irregularities so that your topcoat of dry erase paint will be uniformly even and easy to write and draw on after it cures.
After making sure that the wall is completely smooth (you may need to sand it first with 180- to 240-grit sandpaper), wipe down the surface with a dampened microfiber cloth followed by a dry microfiber cloth. Microfiber fabric is best to use for this purpose because it has extremely small fibers that are able to trap and remove the tiniest of dust and dirt particles and even bacteria.
Next, we highly recommend that you use a high-quality base coat, i.e., ReMARKableTintable Base Paint, which will always adhere well to your substrate. If you use the Tintable Base Paint, you will have to put on two coats and wait for a minimum of three hours between applications. Once the second coat of Base Paint is applied, you’ll need to wait at least 24 hours before installing your premium whiteboard paint. Videos describing and instructional checklists on how to apply dry erase paint should be featured on any manufacturer’s website.
Apply Dry Erase Paint to Your Wall
After the base coat has thoroughly dried, carefully read the instructions supplied with your dry erase paint kit, and use masking tape or preferably painter’s tape to mask off the area you plan to paint. Then use a full-sized nine-inch microfiber paint roller and apply the whiteboard paint over the base coat of your smooth well-prepared wall. Premium dry erase paint should only be applied with a high-end microfiber paint roller cover that has a 1/4-inch or 3/8-inch nap. The shorter the nap on your roller cover is, the finer the quality of surface that you’ll be able to produce. Once you begin applying the whiteboard paint, you will have approximately 40-45 minutes to finish the application process before the paint starts to thicken and thus become unusable. So, plan ahead to ensure that you have enough time allotted to cover the desired surface area without experiencing problems.
Wait for the Dry Erase Paint to Cure
Let the whiteboard paint cure for at least 48 hours. If you write or draw on your whiteboard painted surface before the paint cures completely, your installation will be ruined, and the surface will become unusable. The 48-hour drying time of premium dry erase paint is among the fastest in the industry. In contrast, lower quality epoxy-based dry erase paints can take up to seven days to cure completely, during which time they emit hazardous gases. Slow drying times are a sign of lower quality in dry erase paints and are detrimental to users, as they often require the vacating of an office, a classroom, or other venues while toxic fumes called volatile organic compounds (VOCs) are given off. These gases can endanger the health of people in the area and are still emitted long after the epoxy-based paints have dried. The major reason for top-quality whiteboard paint’s quick drying time is its superior water-based formula, which both dries quickly and also offers an eco-friendly substitute for environmentally damaging and slow-drying epoxy-based dry erase paints.
Write and Draw on Your New Whiteboard Painted Wall!
After the 48-hour drying time is up, your whiteboard wall will look beautiful and be firm and ready to write on. You will then have your very own writing and drawing surface in the home office to optimize your work efficiency and creativity and also make life easier for everyone involved in your Zoom calls. Besides virtual meeting presentations, with a large handy dry erase wall at your disposal, you can perform a wide variety of other tasks that would be harder on the limited surface of a traditional whiteboard or chalkboard. You can also invite your kids to play or do their homework or home school lessons on your new writable wall.
Some of the many ways you can use your handy dry erase wall in the home office are as follows:
· Post your daily or weekly remote work schedule
· Record the contact information of your important colleagues and clients
· Post inspirational quotes that will help you to stay upbeat and productive during the workday
· List all of the priority tasks you need to accomplish along with their due dates
· Take quick notes while talking on the phone with team members and clients
· Keep track of office supplies and other work-related items that you need to order
· Brainstorm ideas for work projects both individually or in virtual meetings
· Draw and doodle while on your breaks to help you relax and increase your mental acuity and focus.
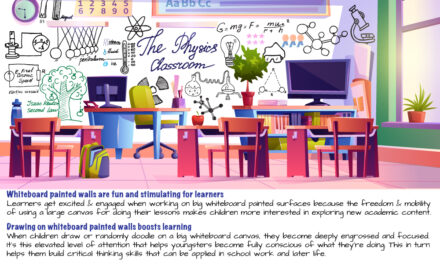
Immediately after dry erase coating is applied, you’ll notice that having the large attractive canvas of a whiteboard painted wall in your home office will help to uplift the atmosphere and improve your ability to do your remote work with greater ease and efficiency.


![Giant Leaps Forward Require Big Spaces. [Leap Year Sale Event!]](https://www.remarkablecoating.com/wp-content/uploads/2016/02/Giant-Leaps-ForwardRequire-Big-Spaces-440x264.jpg)


![30% Off St Patrick’s Day Sale! [Details Inside]](https://www.remarkablecoating.com/wp-content/uploads/2016/03/Glorious-1-440x264.png)

![Drive Your Organization Into Openness and Watch it Expand [20% Off Whiteboard Paint]](https://www.remarkablecoating.com/wp-content/uploads/2016/04/Drive-Your-Organization-Into-Openness-and-Watch-It-Expand.-1-440x264.jpg)


![ReMARKable’s Winter Sale is Here! [25% Off + Free Shipping]](https://www.remarkablecoating.com/wp-content/uploads/2018/01/Red-Tag-Winter-Fashion-Facebook-Post-1-440x264.png)


![ReMARKable Summer Sale 2018 [28% Off Whiteboard Paint]](https://www.remarkablecoating.com/wp-content/uploads/2018/06/Blue-Simple-Line-Beach-Facebook-Post-1-440x264.png)


0 Comments